Thursday, March 28, 2013
Just For Fun
Here's a video that I came across on Pinterest that I thought was worth sharing. It's a very neat idea and must have taken a lot of time to create.
Check out the video HERE
Monday, March 25, 2013
Literacy Kits
This has taken some time to put together, but it might just be one of my new favorite parts of the children's section. With part of the money we received from Senator Robach my Director and I took on the task of creating literacy kits. We wanted to be able to have parents and educators take home a storytime collection in a bag. We put together 20 kits. Most contain three books and a puppet. Others contain flash cards or some sort of manipulative for children and adults to use together. There are language kits, number kits, shapes...the list goes on and on. As soon as a kit gets processed we get it out on the cart. They have been very popular right off the bat.

Here is a sample of the Letters Kit we put together. I came across the Eric Carle flash cards while shopping and couldn't resist adding them to this kit. They are adorable!

Friday, March 22, 2013
Shades of Earth: Book Review
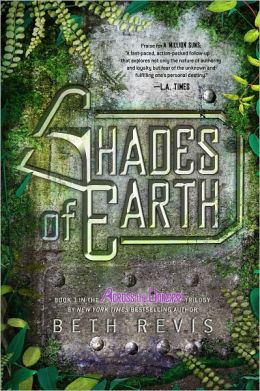
Shades of Earth is the third book in the Across the Universe Trilogy by Beth Revis. The trilogy is straight up Science Fiction-which is a genre I tend to steer clear of, but as soon as I picked up the first book I couldn't put it down. I've been avoiding the last book because I just didn't want the story to end. I will not say much about the story line of this third book, because I want to encourage you to read them all. Shades of Earth is full of action and plot twists. It's full of science, mystery, suspense, and a bit of romance. Teens-boys and girls alike, will zip through this trilogy and then crave more. I'm always suggesting these books to teens who are tired of the paranormal or vampire stories.
Friday, March 15, 2013
Sheep Craft
This is a quick and easy craft to do in storytime or for a school visit. I found this craft here and adapted it a bit.
What you will need:
- White cardstock (cut into strips)
- Small Piece of Green Paper
- Stapler
- Glue stick
- 3 cotton balls (1 will be cut in half)
- Markers or crayons
All this is is a piece of white printer paper cut length-wise into a strip (I will be using a heavier paper like cardstock for my preschool visit). Mine is about 2 1/2" wide. Staple the ends of the paper together to form a cylinder (lamb's body). Using a piece of green paper have the kids cut out a shape for the grass. Staple or glue the lamb body to the grass. I pre-cut cotton balls in half to use for the feet. For the top I used one cotton ball stretched out. The are made by cutting two oval shapes out of the extra cardstock.
The kids are sure to have fun making this cute little guy and it can be used for so many occasions.
I will be using this with the book Little Bo Peep. It can also be used as a spring/Easter.
Enjoy!
Here is what the final craft looks like. These were completed by three-year-olds. Instead of cutting out a shape for the grass they cut fringe into the rectangle I provided them.
*Note: I also used half a cotton ball for the tail.

Tuesday, March 12, 2013
Grimm Scavenger Hunt Part 2
Here's another peek at the scavenger hunt that the teens will be doing this Friday night. As I scramble to pull everything together this week and double check my lists I keep reminding myself how much fun this will all be. Whenever I plan a scavenger hunt I worry that it's not going to go smoothly or I've mixed up a group's clues, but every time it works out just fine. It helps that I make several checklists as I prepare for an event like this.
I found some old, old cassette tape boxes that the library used to use to house the cassette tape collection. This made me laugh because the teens will have no idea what these boxes were originally used for. I thought it would be fun to have the first clue for each group to be presented in a book, so I made a fancy numbered cover and glued it to the cover. Inside is a small compartment with the first clue rolled up. Things like this just add a little fun to the game.
The yellow list is a Fairy Barter List. Part of the game will be to find things in the library (mostly office supplies) that they can trade with the fairies for gold leaf money to purchase necessary items to complete the scavenger hunt. This will also buy me and the other helpers sometime in between teams during challenges.

Here is what the inside of the case looks like with the clue.

Lego Club
I have not had much time to work on my program crafts this week as I get ready for the teen Lock-In that is this Friday. But I do want to share about Lego Club. I host Lego Club twice a month at the library. Years ago I asked the library patrons to donate Old or unwanted Legos to the library. I now have several bins filled to the max with Legos of all sizes. This program has been a hit, it used to be held only once a month last year. The kids and parent's loved it so much that they asked if we could host it more often. Of course I had to say yes!
Here's what we do: The program runs from 4-5pm for children in preschool-6th grade. Kids sometimes come a bit early so I make sure I have the Legos out by 4:45. I spread the bins of Legos throughout the room. Kids are allowed to dump the bins if they wish to. (Everyone helps to clean up at the end.) The kids have an hour to build whatever they like. When they complete a structure I provide name cards and crayons. Kids can write their first name on the card and if they have a title for their creation they can add that too. All creations are displayed on top of some of the book shelves in the children's area. Kids and parents love to come into the library to show of the creations and admires what others have made. This is a well attended and simple program.
Here's what we do: The program runs from 4-5pm for children in preschool-6th grade. Kids sometimes come a bit early so I make sure I have the Legos out by 4:45. I spread the bins of Legos throughout the room. Kids are allowed to dump the bins if they wish to. (Everyone helps to clean up at the end.) The kids have an hour to build whatever they like. When they complete a structure I provide name cards and crayons. Kids can write their first name on the card and if they have a title for their creation they can add that too. All creations are displayed on top of some of the book shelves in the children's area. Kids and parents love to come into the library to show of the creations and admires what others have made. This is a well attended and simple program.
Here's a peak at some of the creations from last Thursday:

It doesn't matter the age or skill level, the kids always have a fun time.


Friday, March 8, 2013
Magic Wand Craft
This was a very messy, but fun project to take on. I needed to make some magic wands for a scavenger hunt. I started off by using some wooden dowels. The thinner ones shown in the pictures are actually the sticks from some puppets I bought for the library. I didn't want the sticks in the puppets so I saved them. Turns out they make great magic wands!.
What you will need:
- wooden dowels (any size you prefer)
- Hot glue gun & glue
- scissors
- Mod Podge
- Glitter (various colors)
- Paint brushes
- something to stand the wands in during drying time (I used to-go drink trays)
- Paper plates or paper to catch excess glitter

Using a hot glue gun drizzle hot glue all over the wooden dowel leaving a spot for the handle. Spin the dowel a bit to allow the glue to cool.

Once all of your dowels are covered in glue and cooled set up a work space with Mod Podge, glitter, and brushes.

Brush Mod Podge all over the dowel. Lay it on thick so the glitter will stick in all the nook and crannies.
(Mikayla is now a professional wand maker)

We used some to-go drink trays with holes punched in them to stand the wands up to dry. Once they've dried a bit go back with the Mod Podge and glitter and fill in any spots missing. Let the second coat dry. Once all the wands are dry give them one last coat of Mod Podge to seal the glitter in.

Here is the finished product! I used a matte finish Mod Podge, but the wands are still super glittery.
Enjoy!
Thursday, March 7, 2013
Grimm Scavenger Hunt Part 1
Since I've been hosting lock-ins at the library I've included a scavenger hunt to help the time go by. This year my Teen Advisory Board wanted to plan the scavenger hunt. The theme is Grimm Fairy Tales. I can't say too much yet since the lock-in is not until next weekend, but the basic gist of the game is:
Teens will be the bad guys from various fairy tales. We branched out a bit from the Grimm tales so we could have a few more characters involved. The teens will be breaking out of the fairyland jail and must complete certain tasks to earn gold leaf money (pictured below) and obtain specific objects that will be needed in order to be freed. It's been fun to work with a couple of the teens on this scavenger hunt. They are full of crazy ideas. I think we've managed to make most of the ideas possible with a little fixing here and there.

I will post more pictures from the different stations they will be visiting as I complete them.
For now I'll leave the gold leaves as a teaser!
Friday, March 1, 2013
Dinosaur Craft
I came across this idea here while searching for new craft ideas and made it a little bit different. I found some dinosaur cutouts in my supplies the other day and wanted to make a cute craft out of it. This is what I decided on and it's super easy to make.
All You need is:
- Small paper plates (1 for the top and 1 for the bottom)
- Stapler
- Crayons
- Dinosaur picture or cutout
- Scissors
- Glue sticks

Have the kids color the top of their eggs before you cut them and decorate their dinosaur They can get creative with patterns and colors.
Cut the top plate in half making a zig zag line so it looks like a cracked egg.

I will be using this craft for my evening storytime to go along with some dinosaur books. This would also be a fun and easy craft for this year's Summer Reading theme: Dig Into Reading!
Enjoy!
Subscribe to:
Posts (Atom)