Showing posts with label Paper Crafts. Show all posts

Monday, April 20, 2015

Creepy Carrot Craft

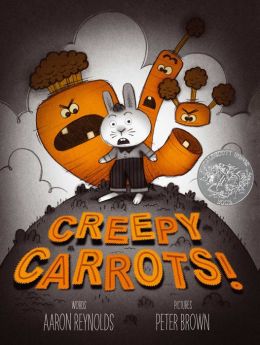
Phew!  Seems like I haven't had time to sit down and post some of my newest crafts in a long time.  I came up with this one last week for a Preschool-2nd grade storytime.  I am showing the movie Creepy Carrots! based on the book by Aaron Reynolds.
I will also be reading:
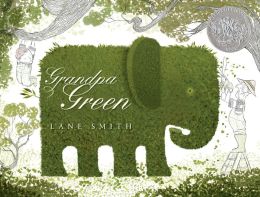
Grandpa Green by Lane Smith
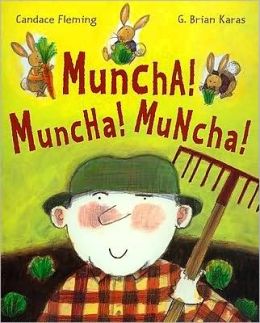
Muncha! Muncha! Muncha! by Candice Fleming


Here is the craft I came up with:
What you will need:
  • Orange foam
  • Green yarn
  • Tapestry needle (or glue the yarn on)
  • Brown construction paper
  • Gray strips of construction paper
  • Kidney beans
  • Googly eyes
  • Markers

Cut carrot shapes out of the foam.  Mine are about 3-4" long.  I used green yarn and a tapestry needle to make the greens of the carrot.  It took a little time, but I really like how it looks, and I am doing this craft with a small group of kids.  
I cut sheets of brown construction paper in half and then folding each piece in half (hamburger fold) leaving about 1/4" tab on the back half.  This is how the carrots will be slipped into the dirt.  Glue the sides leaving the top open.  I added a gray trim to make it look like a garden.  The kids will glue kidney beans around the gray edges to make stones.  
Have the kids add some eyes and squiggly mouths to make their carrots creepy.
Enjoy!
Tuesday, January 13, 2015

Puzzle Piece Snowflake

Here is the craft I made last night with my evening storytime kids.  They LOVED it.  Especially when I mentioned we would be adding some glitter to our projects.  Glitter just makes everything better.

What you need:
  • Cardstock
  • Snowflake template (I found one online)
  • Blue and white puzzle pieces (or you can have the kids paint them)
  • Liquid glue
  • Glitter
  • Hole punch
  • Fishing line


I cut out all the snowflakes ahead of time and double layered the cardstock to make it sturdy.  If I had thicker cardstock on hand, I would have just used that instead.   Punch a hole in the snowflake and tie some fishing line onto it.  To keep things a little on the cleaner side, I put swirls of glue on the snowflake for the kids to cover with puzzle pieces and added the swirls of glue on top of the puzzle pieces for the glitter.  This kept the mess to a minimum.
The kids had a blast making this craft and were very exited to learn that they did not have to put all the puzzle pieces together!
Enjoy!

Monday, September 15, 2014

Paper plate owl

This little guy came out way better than I expected.  I will be using this craft for a Fall craft day later this month.  

What you need:
  • Paper plates
  • Markers
  • Construction paper
  • Glue
  • Scissors


Color the center of the paper plate.  I made a simple squiggle pattern alternating with fall colors to make it look like feathers.  Fold the sides of the plate toward the center to make the wings.  Fold the top half of the plate down about an inch and a half.  Glue in place.  
While that has time to dry cut out two large circles and two small circles for the eyes.  I decided to use yellow and black for the eyes.  Cut out a small triangle and feet out of orange construction paper.  Set these aside and color the wings.  I decided to follow the stripes on the paper plate, you can make any design you like.  Glue the eyes, beak, and feet in place.  There you have it, a cute little owl.
Enjoy!

Thursday, September 11, 2014

Apples and Pumpkins

These are two Pinterest inspired crafts that I will be using in programming this Fall.  Since we have the Apple Fest in out town I try to make an apple craft in the fall.  It was time to change it up this year.  I decided on this adorable apple core craft that I changed up just a bit and this paper pumpkin.  Both are pretty easy to assemble and make great decorations for the home--especially the pumpkin!


Apple Core: Inspired by this pin.
What you need:
  • Toilet paper tubes
  • White paint
  • Paint brushes
  • Black seeds ( I made mine on the computer)
  • Red construction paper Cut into about 5 inch squares
  • Green construction paper
  • Scissors
  • Glue (I used glue sticks and everything is holding up just fine)
I painted all the tubes white before hand so that the kids can get to work assembling their apples.  Have the kids cut a two squiggly circles out of two red squares to glue on the top and bottom of the white tube.  Next, have the kids cut a leaf shape out of green paper and glue to the top red piece.  Or you can make a stencil for them to trace.  Using glue, adhere four seeds to one side of the apple core.  Spin the the apple core to the other side and glue four more seeds to the core.  And that's it!  If you want to add a small worm to the top for fun go for it.  :-) 


Paper Pumpkin: Inspired by this pin. This pin has great step-by-step photos.
What you need:
  • Green pipe cleaner
  • Orange cardstock
  • Hole punch
  • Scissors or paper cutter
First thing you need to do is cut your orange cardstock into long strips.  I did not measure mine so they are not perfect.  For a larger pumpkin-like mine-cut the paper length wise.  For a smaller pumpkin cut the strips on the short side of the paper.  I used two whole sheets of paper for my pumpkin.  If you want this craft to be quicker for a program, cut the paper into strips ahead of time.  Next, use the hole punch on both ends of each strip.  Stack your strips one on top of the other.  String the green pipe cleaner through one end of the strips.  Bend a little of the pipe cleaner to keep the paper from falling off.  String the pipe cleaner through the top of the other end of the papers.  Pinch the pipe cleaner at the top to make a little stem to hold the paper in snug.  Curl the remaining pipe cleaner to look like a little piece of vine.  Now, fan the papers out to make a round pumpkin.  Stand back and admire your creation.


Enjoy!

Friday, June 6, 2014

Robot Themed Storytime

In preparation for Summer Reading I have been doing a robot themed storytime with my some of my school visits.

I read:
Boy + Bot by Ame Dyckman


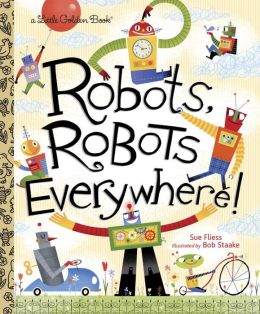
Robots Robots Everywhere by Sue Fliess


The craft: Paper Robot
What you need:
  • Cardstock cut into various sized rectangles
  • Paper straws cut in half for legs
  • Small strips of paper for arms
  • Foam stickers
  • Pipe cleaner for the head
  • Fizz Boom READ sign (optional)
  • Glue stick
I had the robot bodies made ahead by the wonderful Mikayla.  She glued the head, neck and body together. Each straw piece had two small slits on the sides and a drop of school glue to fit over the base of the body.  Pinch it closed for a couple of seconds and the legs will stick.  I had the kids decorate their robots with a variety of foam stickers.  Once they were satisfied with their robots they accordion folded the arms and attached them to the body. The spring or hair at the top of the robot is made using one pipe cleaner. You can wrap it around a pencil or the kids can wrap it around their finger to give it a coiled look.  I had two tiny holes punch at the top of each robot, so we simply poked each end of the pipe cleaner through the holes and folded the end up to keep it in place.  All the robots turned out awesome.
Enjoy!


Tuesday, April 8, 2014

Paper Bag Notebook

While prowling through Pinterest I came across this neat post about 5 minute book binding by Brittany Watson Jepsen.  It took me a little more than 5 minutes to make mine, but with a little practice I can see how a person could easily whip one of the bad boys up in that short amount of time.  I decided to use this in my Teen Art Club.  The best part about these little notebooks is that there's NO GLUE!  I swear my teens make a bigger mess with glue than the preschoolers.  :-)    


I followed Brittany's tutorial.  She has great step by step picture instructions.  I had brown paper lunch bags in my supplies closet to use for the covers.  She forgoes scissors and tears her paper using the edge of the ruler.  My skill with that technique is not quite up to par yet, so I resorted to using scissors.  
The sewing part for the binding is easy to figure out.  The teens should not have a problem with this task. 


Using colored pencils I added some fun Aztec designs to me cover.  Now I have this cute little notebook to doodle in or take notes.
Enjoy!

Friday, March 7, 2014

Confetti Bird Story and Craft

I'm working on my Spring Evening Storytimes and came across the Confetti books.  I will be using Roly-Poly Egg  Snack Time for Confetti by Kali Stileman. 

What you will need:
  • Blue yarn
  • Blue pipe cleaners
  • Brightly colored paper
  • Scissors
  • Hole punches in different sizes
  • Wiggly eyes
  • Liquid glue

I found a fun and easy way to make Confetti out of yarn and a pipe cleaner. One of my oh-so willing Pages made large pompoms out of blue yarn.  My first attempt I used a large store bought pompom, but it didn't look fluffy enough.  I folded a blue pipe cleaner in half and then fold the ends to create feet and glued it to the bottom of the pompom.  Using two different sized hole punches I punched circles out of  brightly colored scrap paper.  I made the beak by cutting a diamond shape out of orange card stock and folding it in half.  Then I glued the eyes (I used two different sizes), paper dots, and beak to the pompom to create Confetti!  Isn't he cute?  The kids will have fun making this little bird and the stories are adorable.


Here's a closer look at Confetti:
Enjoy!

Friday, December 27, 2013

Hanging Moose Craft

I decided to do a moose themed Storytime this winter and wanted a cute moose craft to go with it.  You can print out what I made here.  I found the moose head picture here.  

What you need: 
  • Card stock
  • Crayons
  • Hole punch
  • Yarn
  • Beads (with large enough holes to fit the yarn through)

Print out and cut the moose pieces.  Have children color in their moose.  
Punch a whole in the top of each piece.
Cut a piece of yarn.  It does not need to be too long.  Each moose will need two beads.  I did not use the beads shown in the picture above.  They were too long and made the moose appear floppy.  Instead, I used round ones that were about half that length.  String the legs of the moose, bead, body, bead, and then the head.  Tie the yarn together and now you have this cute little moose.
Moose books to share:
Moose Tracks! by Karma Wilson
 If You Give a Moose a Muffin  by Laura Numeroff
This Moose Belongs To Me by Oliver Jeffers
 Duck Duck Moose  by Dave Horowitz
 The Invisible Moose by Dennis Haseley
 Z Is For Moose  by Kelly L. Bingham
Making the Moose Out Of Life by Nicholas Oldland
Moosestache by Margie Palatini
Moose On the Loose by Kathy-Jo Wargin
Enjoy!

Friday, December 13, 2013

Winter Craft Round Up

Here is a round up of some of my favorite winter crafts from the past couple of years:


Click on the pictures below to learn how to make each craft.   


Thursday, December 12, 2013

Glittered Diamond Ornament

Here's a fun craft I recently did with my Teen Art Club.  We made diamond ornaments using cardstock and the template below. I used this template here.  After some trial and error I decided it was easier to print the template directly on some thicker cardstock.  
The teens thought it would be fun to add glitter to the diamonds-I agreed.  We used Elmer's glue and applied thin layers to small sections at a time adding glitter as we went.  The paper warped slightly, but the dried stiff.  It's very important to use a SMALL amount of glue.  Mod Podge would work to, but I only have a matte finish and didn't want to lose the sparkle of the glitter.
Here's what the glued together diamond looks like before glitter.
And here's the glittered out diamond!  If you want to make this into an ornament poke a small whole into the top of the diamond and slip thread or thin fish line into it and tape secure on the underside.  Glue your diamond shut with the string hanging out of the top.
Enjoy!

Foam Penguin Magnet

This foam penguin makes a great storytime craft or winter program craft.  
I cut all these pieces out prior to the program and put them in little bags for the kids to help keep all their pieces contained as they assemble their penguin.
Here's what you need:
  • Foam-black, white, and orange
  • Scissors
  • Wiggly eyes
  • Glue
  • Magnets
  • Foam markers

Cut out all your foam pieces.  You will need one large black circle, one medium white circle, and one small black circle.  These make the body and head.  You can make your stencils easily in a word document and print them out on cardstock.  I drew the circles using the shapes and found a clip art hat that I liked..  The wings and feet I drew by hand.  You can keep all the shapes very simple.
First, glue your medium circle to the large black circle.  Layer the medium black circle onto the large black circle to make the head of the body.  Glue the wings, feet, hat, eyes, and beak to your penguin.  Color your hat, add a magnet to the back and you're done. 
Enjoy!

Thursday, October 24, 2013

DIY Paper Pinwheel

After much searching on Pinterest and attempting many different methods, I found a great post about making paper pinwheels.  These will make great decorations and are simple enough for teens and older kids to make in a program.  I've already shown my finished to a couple of teens today and they are excited to decorate the Teen Lounge with paper pinwheels!
Here's what you will need:
  • Paper (any kind will work.  I used colored copier paper because that is what I had on hand)
  • Scissors
  • Pencil
  • Ruler
  • Glue stick
  • Paper clips
To make the large pinwheel I used three pieces of 81/2"x11" paper.  Take a piece of paper and fold it accordion style along the short end, like the picture below, until it's completely folded,.  Do this to all three pieces.

Once your pieces of paper are folded, fold each one in half and glue the middle pieces together.  I secured mine with paper clips while the glue dried.
Now that you have three fan-like pieces, glue them together side by side, to create a circle. Secure with pins.  This is your first pinwheel!
While that pinwheel is drying, cut three 4" squares out of different colored paper.  Fold and glue these together like the first pinwheel.
Glue the small pinwheel to the large pinwheel.
Now, you can have some fun with what you put on the middle.  I decided to go the easy route with this one and printed out some free tags from Chic Tags.  Add some ribbon to the back to hang from the ceiling or a wall and you're done.
Enjoy!