Tuesday, August 27, 2013

3-D Turkey Cube

Still working on changing up my fall crafts. This 3-D turkey is what I came up with.  I made a 3-D cube out of a cereal box.  Just Google search "3-D cube template"  and you will have many choices and sizes to choose from.  

What you will need:
  • Thin cardboard or an empty cereal box
  • Cube template
  • Pencil
  • Scissors
  • Exacto knife
  • Colored paper
  • Foam (for feet or you can use paper for that too)
  • Fake leaves (or paper ones)
  • Googly eyes
  • Craft glue
How to make this cute little turkey:

Print out a cube template and cut it out.  Trace it onto a piece of cereal box or thin cardboard. Cut out the cardboard cube.  Using the exacto knife, score the edges that will be fold by lightly pressing the knife along those lines.  Be sure not to cut all the way through.  Fold all the edges that need to be folded and with some patience, glue the box together.  Pick out about 5 leaves to use as tail feather.  Layer and glue them together.  Glue your stack of leaves to the back of the cube. NOTE: I used a hot glue gun with my leaves because I didn't have good craft glue handy at the time and regular school glue wasn't cutting it. While your leaves are drying to the box, cut out a beak and gobbler from paper and feet from a piece of foam.  Glue two googly eyes to the front of your cube along with the beak, gobbler, and feet.  Let everything dry for a few minutes and you're done!  Look how cute this square turkey is.  :-)

For the library kids I will have fun fall scrapbook paper to cover the cubes with and crayons to give each turkey a little more personality.
Enjoy!

Wednesday, August 21, 2013

Fall Leaf Crafts


As I was planning my Fall Evening Storytimes, I decided to change things up a bit this year.  I'm working on finding that activity that is just right for my first session. I'm reading books about Fall colors and leaves.  The last two  years I've done Fusion Paper leaves using liquid watercolor.  They always come out great-but they take too long to dry.  Here's what I came up with as alternatives.  
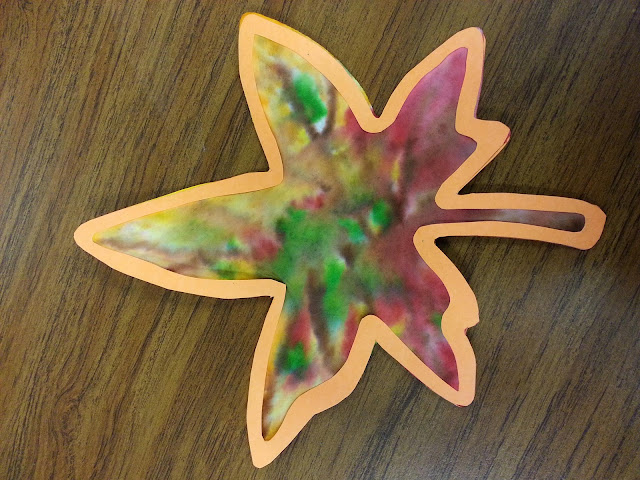
The first is still using my leaf shaped fusion paper (you can also use coffee filters and cut them into the leaf shapes) and markers.  This is fun for the kids because they can color all over the leaf and then mist it with water.  The kids will be entertained as the colors bleed together.  For the frame I cut two leaf shapes out of card stock and glued to either side of the colored leaf.  This method of coloring the leaf dries quickly and comes out nice.

The second leaf  I made with glitter and Mod Podge.  This one is slightly on the messy side because glitter just has a way of getting everywhere! The kids will be given paintbrushes and Mod Podge and work in small sections to cover their leaves with different fall colored glitter.  
Enjoy!

Wednesday, August 14, 2013

Porthole Fish Craft

Who doesn't want to make a paper plate porthole?!  I'm going to be doing a fish themed storytime this fall and I wanted to change up the craft.  I came up with this porthole using paper plates and transparency paper.   With some prep work beforehand this is going to be a fun simple craft for the kids.

What you need:


  • 2 paper plates (one with the center cut out)
  • Transparency paper or plastic wrap
  • Small shells
  • Blue paper or crayons to color background blue
  • Sand (not pictured in sample)
  • Gems or sequins for bubbles
  • Cutouts of fish and seaweed (or have kids draw)  I will be using foam fish stickers for storytime.
  • Silver Sharpie or crayon
  • Glue sticks
  • liquid glue
  • Scotch tape

Here's how to put it all together:
Cut a circle out of the center of one paper plate.  Tape a piece of transparency or plastic wrap tightly over the whole.  This will make your window.  Be sure to place tape on the inside part so you don't see the tape when the plates are glued together. Set this plate aside.
Cut out a blue piece of paper and glue to the top of the other plate, or have children color the other plate blue with a crayon.  I did not have any sand handy when I made my sample, but I will have the kids add a little bit of sand to the bottom of the plate under the seaweed.  Next decorate with seaweed, fish, and shells.  Use glue sticks to glue paper shapes to the blue background.  I used liquid glue to attach the shells.  
For storytime I will have foam fish shapes to use instead of paper cutouts.
Once your fish are in place add some clear gems to make air bubbles.
Now for the fun part.  Using the glue sparingly outline the bottom plate with liquid glue. Place the top plate with the window on top of the bottom plate.  Go around the outside edge gently pressing the two pieces together.
Next add some rivets to the outside plate with a marker or crayon by drawing small circles all around the inside edge.
Now, go show off your beautiful creation.
Enjoy!

Tuesday, August 13, 2013

Paper Bag Owl

This cute little owl was inspired by this Goody Bag post.  You can find the print out for the face at the link as well.  Using a word document I made ovals for the wings and hearts for the feet.  You can simply draw the shapes and cut them out if you like.

This owl will make a cute centerpiece for Fall or you can fill it with goodies for a Harvest party.  When I make this with the kids I will have some recycled paper to stuff inside the bag to give it a rounder shape.  I will also give the kids a chance to color the bag before it is turned into an owl.
What you need:
  • Small brown paper bags
  • construction paper for wings and feet or shapes printed out
  • Cardstock or thick paper to print the face on
  • Scissors
  • Crayons to color paper bag
  • Stapler
  • Glue sticks
Instructions:
  1. Have kids color their paper bags as they like
  2. Stuff bags with paper or goodies
  3. Fold the top down twice and staple shut
  4. Cut out the face, wings, and feet
  5. Using a glue stick, glue the face to the front of the bag covering the fold
  6. Glue the wings to the sides of the bags and feet to the bottom
  7. Show off your new owl
Enjoy!